Your lawn and landscape needs sufficient water to survive and be healthy. Rainfall is not always predictable or reliable in achieving this need. From time to time we have dry spells or droughts. It is for this reason that we install sprinkler systems in our residential landscapes today.

Watering a lawn by hand can be a very tedious task. Typically a lawn needs approximately 0.5” of water 3 times a week. If we aren't receiving enough rainfall this can be a very demanding task to keep enough water on the grass. The main goal achieved by installing a sprinkler system is to provide even head to head coverage of lawn areas. Proper watering ensures we are getting the correct amount of water in all of the landscape areas but not too much.

When it comes to the basic components of a sprinkler system installation we first have to plan and map out the system. In order to do this we need to know the pressure (psi) and flow rate (gpm) of your water source. These two numbers will determine the number of sprinkler heads we can run per zone. Depending on the source we may or may not need to install a backflow device. The water source for some homes may be a local water provider, while on others it may be a well system or sourced from a pond. A backflow device should be used whenever connecting to a culinary supply of water. The location of the controller should be close to an outlet and provide easy access for wires from the landscape. If there is WiFi available at the controller location we typically use a Smart Irrigation Controller. Check out our article on Embracing Smart Sprinkler Technology.

Once we have determined the desired locations of sprinkler system components we need to call MO One Call (811 Call Before You Dig) for a utility locate. This may alter the desired location of our sprinkler lines. Sprinkler pipes generally are buried 9-12” deep. Proper depth reduces the likelihood of the pipe getting damaged from frost and other surface activities such as lawn aeration or even the weight of a vehicle driving over them.

There are a few different methods for installing sprinkler pipe and controller wire. Trenchless excavation can be performed using equipment such as a pipe puller or vibratory plow. This can be a great method if the soil conditions are ideal. Soils that are full of hard packed clay, rocks and roots are usually problematic for pipe pullers. Another form of trenchless excavation is the use of a directional boring machine. This is often used by utility companies when going under existing infrastructure such as streets. Boring is typically cost prohibitive for landscaping and is only used rarely to go under existing driveways. We highly recommend the installation of sleeves under new asphalt or concrete driveways. This can be done at a fraction of the cost of boring or cutting and patching an existing driveway.

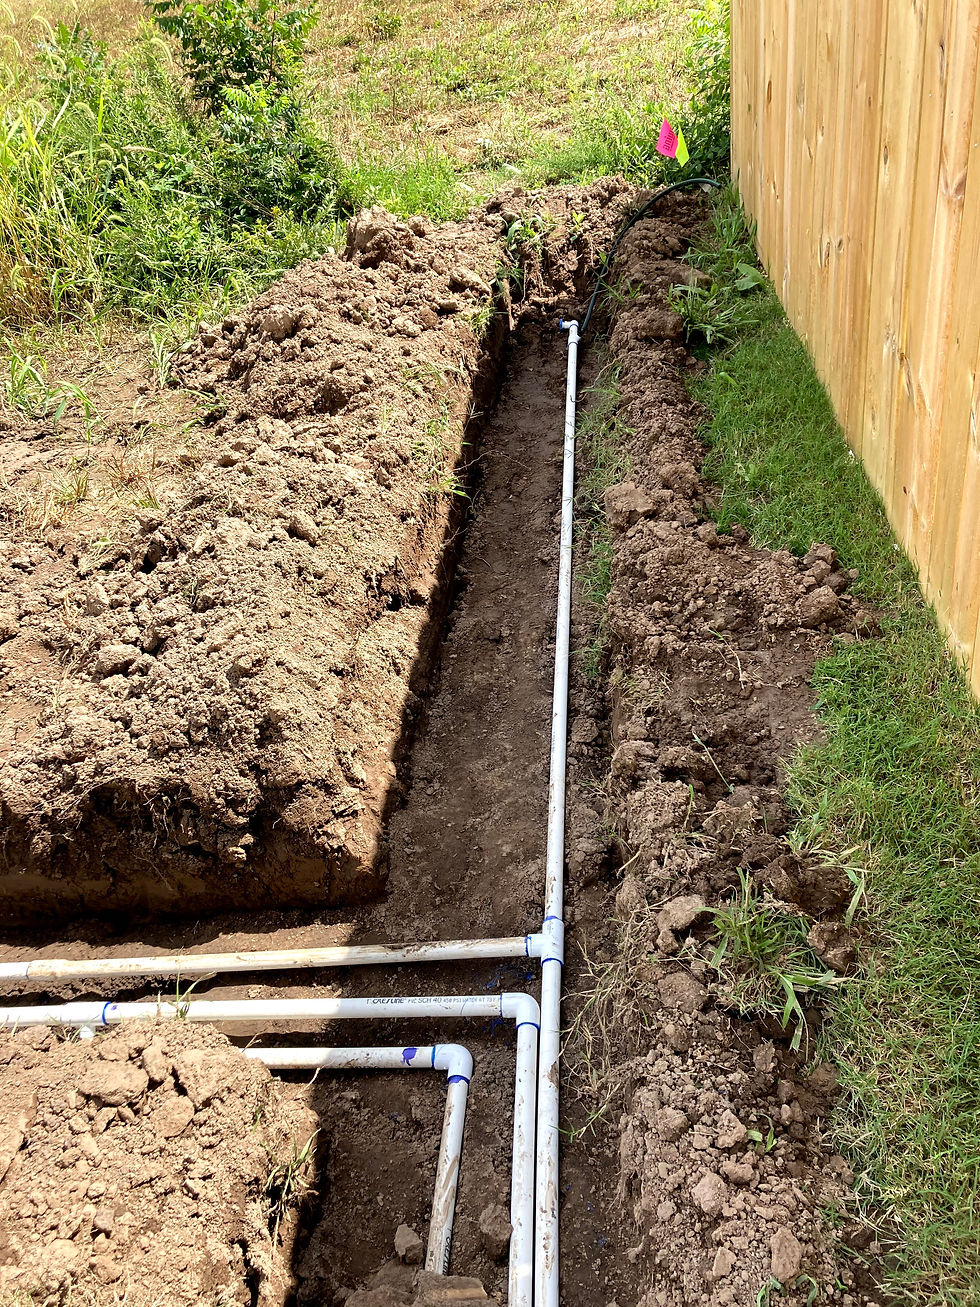
Traditional trenching methods in the landscaping and sprinkler industry are the use of an excavator with a narrow bucket or a skid steer trencher attachment. The trencher attachment for a skid steer has a large metal chain with a width of 4-6”. The chain will often have carbide teeth or cutters to cut through the soil like a chainsaw. Skid steer trenchers may have difficulty with hard packed rocky and root filled soil. Additionally, due the narrowness of the trench, pipes often clump together during backfill. We typically use a 12” trenching bucket on our compact excavator for our sprinkler systems. If there are multiple pipes in one trench this allows the pipe to lay spread out on the bottom of the trench which prevents pipes from sitting on top of each other when backfilling. This not only ensures that all the pipes are at the proper depth but also makes for a much easier repair in the event that repairs are needed in the future.

Typically a new sprinkler system is installed between the rough grade and finish grade stages of construction. Lawns, whether hydroseeding, seeding or sod are typically performed after the topsoil is installed and finish grading is performed. Subsoil often has undesirable soil types such as high clay or is rocky. The trenching process will bring this unwanted material to the surface. Once sprinkler pipes have been installed, the lines will be backfilled and buried. After we backfill our trenches we will use the equipment to compact the trenches. We typically follow up with a soil conditioner, often called a Harley Rake, to remove any 2” or larger rocks from the surface and finish by rough grading. We recommend a minimum of 2-4” of topsoil installed on the rough grade which is then followed up with a mechanical landscape rake or soil conditioner to prepare the soil for seed or sod.


When installing a new sprinkler system in an existing lawn there are a few additional steps that need to be taken. It requires more effort to work around an existing yard. Depending on whether your lawn is immaculate or in need of a serious renovation, that can drastically dictate what course of action we take. Regardless of the condition, the trenching process will bring up subsoil, rock and roots to the surface.


We like to Keep Our Job Site Clean and one of the ways we do that is with the use of ground protection mats. When trenching for new sprinkler lines we can use the mats to place soil on to protect your grass as best as possible. The hardest step is separating the materials after the sprinkler pipe has been installed. Additionally we are unable to keep a thin layer of topsoil separated from the subsurface material resulting in less than ideal growing conditions where the pipe is laid. It can also be difficult to level and compact the trench in an efficient manner. It is always our goal that your yard looks better after we complete a project. However with a sprinkler installation in an existing yard sometimes it will take several months for the yard to look as good or better than when we started.


For smaller sprinkler repairs we will typically remove the existing lawn, or sod with a sod cutter or by hand. Once the repair is made we can reinstall the excavated material and finish by installing the sod back on top of the repair. Sometimes the result will look like we were never there. For minor repairs seams may require a few weeks to grow back together. With larger projects these results can be much more difficult to achieve. Not only is this type of repair very labor intensive but the sod also needs to be re-installed fairly quickly for best results. If the sod is not reinstalled within 24 hours the likelihood of survival diminishes rapidly.

A more affordable option when repairing an existing yard after sprinkler installation is to seed the trench area. This will take longer to grow in and match your existing yard. But now with the yard having a sprinkler system we have more control over the seeding process and don’t have to rely on the weather as much in order to establish a new lawn.
In summary there are a variety of solutions for a variety of different projects. Each project is unique and demands a different solution. At the end of the day we are problem solvers and are simply providing solutions for problems that you might encounter in your outdoor spaces. We see each project as a challenge and an opportunity to solve a need.

Jasper Ridge landscaping provides “Professional Landscape Services” to the Joplin and surrounding areas; including Carl Junction and Webb City. Our service area is contained within Jasper and Newton Counties in Missouri (MO). For more information about Jasper Ridge LLC please contact us using the contact form.
Comments